|
|
|
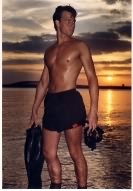
Ever want to have two pictures combined into a single picture? Here is your chance to learn how to do this and a few other things along the way. My choices in the pictures to use here was limited so i used what i had on hand. I always save real nice pictures that i find on the net for future use. So lets get started. The first pic is danny taken from a model website. Its a lot taller than i need for an avatar but we will fix that. By the way, Danny approves of this use of his picture.
This picture is facing the wrong way from what I want and is much too narrow to make a good avatar. So first I must reverse the pic by clicking image, then mirror. Then I made a blank image the same height, but 150 pixels wide instead of the pic's 133. I transfered danny over to the blank and positioned him to the right side of the blank.
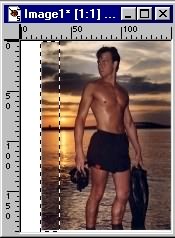
Now I will add a section to the left sideof the picture. Click the selection tool
, set at rectangle, then starting at the top left of dannys pic make a long rectangle the height of the picture and approximately 20 pixels wide. Then holding the "alt" key down, click in the center of the rectangle and drag it to the left and align it like so:
After you move the section over, then right click in the middle of the rectangle to lock it into place.
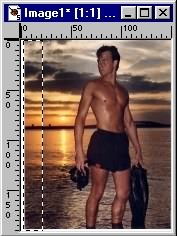
Now to add the layer I want to this av. Right now it just looks like hes looking at something down the beach. I wanted to convey what he was looking at so I found "clara".
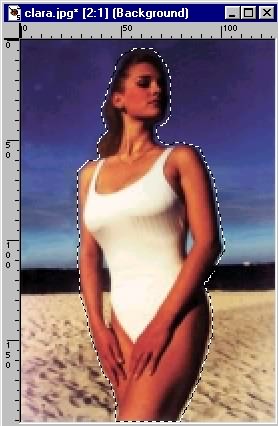
Hey, did you notice how much bigger this picture is? We will fix that and take care of the background so we can add clara to dannys picture. Now do you see what he was staring at? hehe
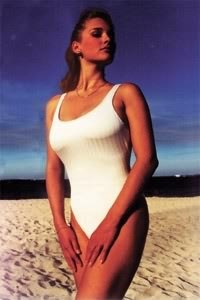
First thing i did to clara's pic is make the height the same as the danny pic. Make sure "maintain aspect ratio" is checked so she stays in proportion. Then magnify her picture once, click on the "lasso" tool, set it to "point to point", and carefully click points around the outside of her body. It doesnt matter how many points you click, so click a lot of them and get in close so you dont get any background with her. I must have clicked 100 points around her. Once you have gone all the way around her and have the dotted line connected back where you started, then right click your mouse to make the selection. Now , Click the button at the top"Edit" then"Copy" (shortcut is "ctrl"+ "c" keys). Then Highlight the danny pic, and up on the control buttons at the top click :Edit" then "Paste" (shortcut is "ctrl"+ "L" keys). Now clara is on the danny pic.
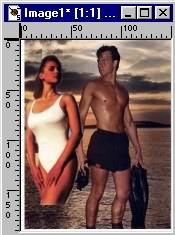
I moved her by left clicking on her and dragging her over to where i wanted. She was still too large for me so I clicked image/resize and with "maintain proportions" still checked, I reduced her size to 80%. I also increased the brightness of clara with the colors/adjust - brightness/contrast set to 6 bright and 3 contrast.
I moved her again to fit better, faded her with the transparency button to 57. Then I cropped the white from the left and bottom sides. Now I resized the picture by first clicking Layers/merge/merge visible, and then image/resize. Using "maintain proportions" again, I set the width to 102 pixels. To get the 116 pixel height I needed I just started at the top left with the crop tool
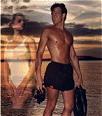
and when the third set of numbers at the bottom left said (102, 116), I stopped and cropped the picture there. Look in the gray bar at the bottom left, there will be 4 sets of numbers. The 3rd set is the size that you are cropping to. And there ya go, you just save the picture as a gif and you have a mega avatar for virtual places.
to the The Layers Page
back to the Avatar page.
or back to the PSP index page.