|
|
|
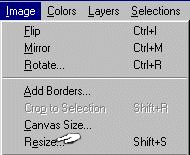
This lesson is about adjusting and sizing pictures. If you are not going to try and "crop" parts out of a picture then using the resize button is all you need.
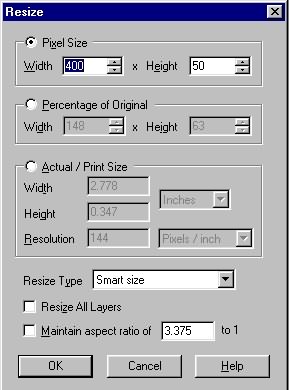
There are 2 ways there to resize, one is to type in the pixel size you need, and the other is to use percentage. Percentage is good to use if you are not concerned about the final exact size of a picture. Using pixels for resize lets you specify the exact size you want. If you are concerned about proportions on the picture put a check in the "Maintain Aspect Ratio". Then when you type in a width the height automatically resizes to keep proportions. This does not mean that the picture will look exactly the same as before the resize because a very large picture will still loose some definition by the resize.
In order to have a smaller file size, you can also change the resolution of a picture. You will have to play with this, not changing the width or height, but by changing the resolution from 100-150 to 72 pixels per inch can reduce the file size by30% to 50%. This can speed up download time for your web page by a lot. You will have to decide if the download time is worth the lower quality picture. To change resolution, put a dot in "Actual / Print Size" and change the resolution just before you save the file.
A lot of pictures that you want to use on a web page have backgrounds on them that is unnecessary. Using the Crop tool in the left column, you can cut this extra background away for the part of the picture you want to use.
The hand is pointing where you click to Crop a picture.
Your curser will look like the crop tool when you click on it. Place the curser at the top left part of the picture you want to save, hold the click when you click it and move the curser to the bottom right of where you want to save it. Let go of the click your holding, then go up to Image, click, then click on "Crop".Everything outside of where you used the Crop tool is cut out. Dont like where it was cropped to?, Then just Undo and start over. And if you started the crop tool in the wrong place, by placing the curser in the middle of the line on each side, to where you see a double-headed arrow, clicking on it , you can move the side to where you want it before clicking the Image/Crop button.
*A little side note here* I did not like how it was hard to see thecenter of the crop tool. I found in PSP that you can change to a "precise cursor" by going to file/preferences, and clicking on the "cursors and tablets" tab. There put a check mark in the "use precise cursor" and try the "show brush shape outline" too. You can change these back at any time if you dont like them. Try them, you may like them.
The usual format to save web page pictures are "gif" or "jpg". So you ask what is the difference? It can be a lot in a large picture. If you want the background to show around a image so it looks like part of the background then you must make the picture a gif. Gif's can have one color specified as a "transparent color". This is the background color of the picture usually, but can be any color you want to set it at. The pictures below are a jpg and a gif of the same picture. I have set the background of the gif as transparent.
The jpg above is 6.35 K, and the gif is 3.53 K. On smaller pictures, or with pictures that dont have a lot of colors in them, gifs will be smaller in size than jpg's. So this is a good use for gif's. The transparency for the gif was done by clicking Colors (at the top), then clicking "Set Color Transparency". This brings up a window that says the picture must be reduced to 256 colors. Click yes to this and another window comes up which you click ok to. A third window comes up to set the transparency, in which you click a dot in "Set Transparency to the Background Color", and click OK. Make sure that the background color in the lower of the 2 windows together in the color tools palette on the right side is the color you want to make transparent.
JPG's in large pictures will have smaller file sizes than gif's. JPG's can be compressed for file size, but you must be careful that too much compression will make the picture look terrible. I usually save jpg's 3 or 4 times with different compressions to see which will work the best. Save the one you want and just delete the others. You set the compression when you click "File" then "Save As"or "Save Copy As". On the window that comes up, near the bottom right is a "options" button. Click on that button and another window comes up. In the middle is a button to set the compression. Move the button by clicking on it and setting somewhere between 10 and 50%. Remember more compression means smaller file sizes but at a loss of picture quality. That is why I save 3 or 4 at different compressions. Then you can compare them and throw out the ones you dont like. When saving multiple files of the same picture i just add ascending numbers to the end of the name of each picture.
clicking the options button when saving a picture as a jpg will give you this window. Moving the button in the middle lets you save at whatever compression you like. A note here: If your are moving jpg's from one folder to another by saving as, make sure compression is set to the lowest it can be. Otherwise every time you save to another folder the picture gets compressed again. Then your pictures dont look like what you want them to be.
to the making of Avatars for Virtual Places.
back to the Backgrounds Page
back to PSP Basics Page